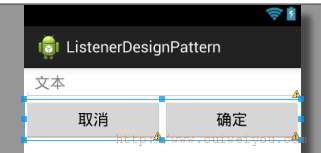
一。自定义Dialog
|
1 2 3 4 5 6 7 8 9 10 11 12 13 14 15 |
<LinearLayout> <EditText android:id="@+id/et" android:hint="文本" /> <LinearLayout> <Button android:id="@+id/btn_no" android:text="取消" /> <Button android:id="@+id/btn_ok" android:text="确定" /> </LinearLayout> </LinearLayout> |
二。自定义Dialog实现类,实现监听器方法,
|
1 2 3 4 5 6 7 8 9 10 11 12 13 14 15 16 17 18 19 20 21 22 23 24 25 26 27 28 29 30 31 32 33 34 35 36 37 38 39 40 41 42 43 44 45 46 47 48 49 50 51 52 53 54 55 56 57 58 59 60 61 62 63 64 65 66 67 68 69 70 71 72 73 74 75 76 77 78 79 80 81 82 83 84 85 86 87 88 89 90 91 92 93 94 95 96 97 98 99 100 101 102 103 104 |
/*** * 自定义的Dialog类,不是AlertDialog * 实现了View的点击监听 * @author www.cuiweiyou.com */ public class CustomAlertDialog extends android.app.Dialog implements android.view.View.OnClickListener { private View view; private Button btn_no; private Button btn_ok; private EditText et; /** * 一。内部接口,要求实现一个callback方法 * @author Administrator cuiweiyou.com */ private ICallBack icb; /** * 初始化界面 */ private void initView (){ view = LayoutInflater.from(getContext()).inflate(R.layout.layout_custom_alertdialog, null); et = (EditText) view.findViewById(R.id.et); btn_no = (Button) view.findViewById(R.id.btn_no); btn_no.setOnClickListener(this); btn_ok = (Button) view.findViewById(R.id.btn_ok); btn_ok.setOnClickListener(this); setContentView(view); } protected CustomAlertDialog(Context context) { super(context); initView (); } public CustomAlertDialog(Context context, boolean cancelable, OnCancelListener cancelListener) { super(context, cancelable, cancelListener); initView (); } public CustomAlertDialog(Context context, int theme) { super(context, theme); initView (); } /** * 二。自定义的构造方法,需要一个ICallBack接口 * @param context * @param icb 回调器 */ protected CustomAlertDialog(Context context, ICallBack icb) { super(context); this.icb = icb; initView (); } /** * 三。设置回调变量 * @param cb */ // 如果不是使用上面接收icallback参数的(二)构造方法创建此自定义对话框,则需要使用此方法指定icb变量 public void setCallBack (ICallBack cb) { icb = cb; } /** * 四。实现的监听器的方法,判断点击的控件 * 当此自定义对话框点击按钮2时,向属性icb实例传一个参数 * 这个参数会被界面接收使用 */ @Override public void onClick(View v) { switch (v.getId()) { case R.id.btn_no: dismiss(); break; case R.id.btn_ok: if(icb != null){ // 这个方法在传入的回调器中实现 icb.callback(et.getText().toString()); } break; default: break; } } /** * 一。内部接口,要求实现一个callback方法 * @author Administrator cuiweiyou.com */ interface ICallBack { void callback(String str); } } |
三。自定义Dialog与Activity
|
1 2 3 4 5 6 7 8 9 10 11 12 13 14 15 16 17 18 19 20 21 22 23 24 25 26 27 28 29 30 31 32 33 34 35 36 37 38 39 40 |
public class MainActivity extends Activity { @Override protected void onCreate(Bundle savedInstanceState) { super.onCreate(savedInstanceState); setContentView(R.layout.activity_main); final TextView v = (TextView)findViewById(R.id.tv); /** * 使用自定义构造方法创建对话框 * 第二个参数实现回调 * 当点击对话框按钮时,在监听处理中调用回调方法, * 即现在实现的,传入的callback方法 * 此方法接收 自定义对话框传入的文本框字串 ,设置到界面上 */ CustomAlertDialog dialog = new CustomAlertDialog(MainActivity.this, new ICallBack() { /** 通过自定义对话框所属的回调,传递参数到界面 **/ @Override public void callback(String str) { v.setText(str); } }); /* // 如果不是通过上面传入两个参数创建对话框,则须如此手动设置回调 dialog.setCallBack(new ICallBack() { @Override public void callback(String str) { v.setText(str); } }); */ dialog.show(); } } |
下面是一点须要回复才能看到的东东:
哈哈,没什么啦
声明
本文由崔维友 威格灵 cuiweiyou vigiles cuiweiyou 原创,转载请注明出处:http://www.gaohaiyan.com/846.html
承接App定制、企业web站点、办公系统软件 设计开发,外包项目,毕设
和bindService(intent,connection,BIND_AUTO_CREATE)")


