现在官方已经提供了安装器,可以自动加载系统镜像写入cd卡。
https://www.raspberrypi.com/software/ 。

镜像下载见 【2.系统镜像准备】
1.硬件准备
1)树莓派3B+
2)8G+的TF存储卡
3)TF卡读卡器
4)Mac/Window系统的电脑
2.系统镜像准备
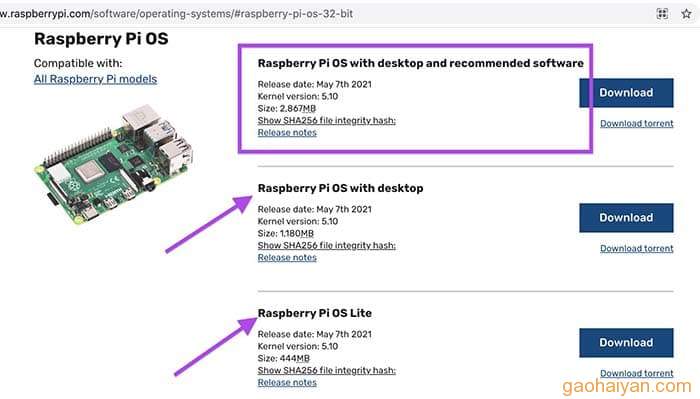
下载地址:https://www.raspberrypi.com/software/operating-systems/#raspberry-pi-os-32-bit
2018-06-27-raspbian-stretch,下载后为zip压缩包(约2G),解压出img文件(约5G)。
3.格式化TF卡
下载地址:https://www.sdcard.org/chs/downloads/formatter_4/index.html
选择Mac或Windows的SD card formatter 对内存卡格式化
4.写入镜像到TF卡
1)Windows系统:Win32 Disk Imager
下载地址 https://sourceforge.net/projects/win32diskimager/
写好的SD卡在Windos下显示为一个Boot盘
2)Mac系统参考 https://www.jianshu.com/p/e95c406badaa
5.系统预配置
打开Boot盘,
1)在根目录,创建一个名称为“ssh”的文件夹或无后缀文件,用于开启ssh
2)在boot中,创建一个名称为“wpa_supplicant.conf”的文本文件,内容:
|
1 2 3 4 5 6 7 8 9 10 |
country=CN ctrl_interface=DIR=/var/run/wpa_supplicant GROUP=netdev update_config=1 network={ ssid="wifi名称" psk="密码" key_mgmt=WPA-PSK priority=1 } |
6.显示配置
在boot目录下,找到config.txt文件
|
1 2 3 4 5 6 7 8 9 10 11 12 13 14 |
# 打开后会类似于win的安全模式。开启的话其它显示相关设置无效 #hdmi_safe=1 # 打开后去掉开机屏幕周围的黑色边框 disable_overscan=1 # uncomment to force a specific HDMI mode (this will force VGA) hdmi_group=2 # CEA模式为1,DMT模式为2 hdmi_mode=58 # 分辨率为适应屏幕分辨率的选择 # uncomment to force a HDMI mode rather than DVI. This can make audio work in DMT (computer monitor) modes hdmi_drive=2 # uncomment to increase signal to HDMI, if you have interference, blanking, or no display config_hdmi_boost=4 # Enable audio (loads snd_bcm2835) dtparam=audio=on |
7.开机获取树莓派的ip
将TF卡插入树莓派,通电启动
进入路由器的后台页面,查找树莓派的ip地址
8.连接树莓派
下载地址 https://www.chiark.greenend.org.uk/~sgtatham/putty/latest.html
如使用 https://the.earth.li/~sgtatham/putty/latest/w64/putty.exe
在“Host Name (for IP address)” 中填入树莓派的ip,“Open”
默认账号 pi,密码 raspberry 。
9.更新系统
上一步成功,进入树莓派的终端以后
1)sudo raspi-config,选择Advanced Options,选择Expand Filesystem,Select。此步骤将系统扩展到整个SD卡,使得系统资源利用率更高,运行更流畅。
2)Back,
(1)Interfacing Options,VNC,Yes,开启VNC服务
(2)编辑 /etc/init.d/vncserver ,[sudo nano /etc/init.d/vncserver]添加命令:
|
1 2 3 4 5 6 7 8 9 10 11 12 13 14 15 16 17 18 19 20 21 22 23 24 25 26 27 28 29 30 31 32 33 34 |
#!/bin/sh ### BEGIN INIT INFO # Provides: vncserver # Required-Start: $local_fs # Required-Stop: $local_fs # Default-Start: 2 3 4 5 # Default-Stop: 0 1 6 # Short-Description: Start/stop vncserver ### END INIT INFO # More details see: # http://www.penguintutor.com/linux/vnc ### Customize this entry # Set the USER variable to the name of the user to start vncserver under export USER='pi' ### End customization required eval cd ~$USER case "$1" in start) # 色深,分辨率,控制台号(远程访问时端口号=5900+这个控制台号) su $USER -c '/usr/bin/vncserver -depth 16 -geometry 1024x768 :1' echo "Starting VNC server for $USER " ;; stop) # 同上控制台号 su $USER -c '/usr/bin/vncserver -kill :1' echo "vncserver stopped" ;; *) echo "Usage: /etc/init.d/vncserver {start|stop}" exit 1 ;; esac exit 0 |
(3)执行命令
sudo chmod 755 /etc/init.d/vncserver 增加权限
sudo update-rc.d vncserver defaults 开机自启动
(4)执行 tightvncserver 指令测试是否需要创建登录密码及设置端口
10.更新软件源
1)修改/etc/apt/sources.list.d/raspi.list
|
1 2 3 4 5 |
# 中科大 deb https://mirrors.ustc.edu.cn/archive.raspberrypi.org/ stretch main ui # 清华 deb https://mirrors.tuna.tsinghua.edu.cn/raspberrypi/ stretch main ui |
2)修改/etc/apt/sources.list
|
1 2 3 4 5 6 7 8 9 10 11 12 13 14 15 |
# 中科大 deb http://mirrors.ustc.edu.cn/raspbian/raspbian/ stretch main contrib non-free rpi # 清华 deb https://mirrors.tuna.tsinghua.edu.cn/raspbian/raspbian/ stretch main contrib non-free rpi # 大连东软 deb http://mirrors.neusoft.edu.cn/raspbian/raspbian/ stretch main contrib non-free rpi # 重庆大学 deb http://mirrors.cqu.edu.cn/raspbian/raspbian/ stretch main contrib non-free rpi # 浙江大学 deb http://mirrors.zju.edu.cn/raspbian/raspbian/ stretch main contrib non-free rpi # 阿里云 deb http://mirrors.aliyun.com/raspbian/raspbian/ stretch main contrib non-free rpi # 搜狐 deb http://mirrors.sohu.com/raspbian/raspbian/ stretch main contrib non-free rpi |
11.安装fcitx输入法
sudo apt-get update。
sudo apt install fcitx。
sudo raspi-config 命令修改键盘布局,将英国键盘更改为中文输入键盘或是US键盘输入。
12.重启
sudo reboot 。
13.连接树莓派桌面
通过VNC Viewer软件,
RemoteHost:树莓派的ip:控制台号
本文由崔维友 威格灵 cuiweiyou vigiles cuiweiyou 原创,转载请注明出处:http://www.gaohaiyan.com/2255.html
承接App定制、企业web站点、办公系统软件 设计开发,外包项目,毕设


