请参阅谷歌官方文档,此文如有误请指正,谢谢!
https://developer.android.com/things/sdk/index.html
准备
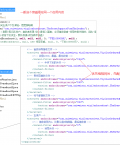
Android SDK tools 升级到24以上
Android SDK api 升级到24以上
依赖
为新建的项目添加必须的things依赖
1.主app的build.gradle文件:
|
1 2 3 4 5 6 |
dependencies { ... provided 'com.google.android.things:androidthings:0.1-devpreview' } |
2.在manifest文件:
|
1 2 3 4 5 6 |
<application ...> <uses-library android:name="com.google.android.things"/> ... </application> |
入口
创建一个入口Activity,并做必要的配置:
|
1 2 3 4 5 6 7 8 9 10 11 12 13 14 15 16 17 18 19 20 |
<application android:label="@string/app_name"> <uses-library android:name="com.google.android.things"/> <activity android:name=".HomeActivity"> <!-- 可选的 启动activity的配置 --> <intent-filter> <action android:name="android.intent.action.MAIN"/> <category android:name="android.intent.category.LAUNCHER"/> </intent-filter> <!-- 物联网启动配置 --> <intent-filter> <action android:name="android.intent.action.MAIN"/> <category android:name="android.intent.category.IOT_LAUNCHER"/> <category android:name="android.intent.category.DEFAULT"/> </intent-filter> </activity> </application> |
连接
首先要有一个通用输入输出(GPIO)设备,基于此连接到目标外围设备(外设)。
如此将GPIO和面包板连接:
1.Connect one side of the button to the chosen GPIO input pin, and the other side to ground.
2.Connect the same GPIO input pin to +3.3V through a pull-up resistor.
3.Connect the chosen GPIO output pin to one side of a series resistor.
4.Connect the other side of the resistor to the anode side (longer lead) of the LED.
5.Connect the cathode side (shorter lead) of the LED to ground.

英语好的如上操作,看不懂的如下操作:
1.选择一个GPIO的输入针脚,连到面包板的按钮的一端,按钮另一端连到GPIO的接地针脚。
2.再把这个输入针脚先连到面包板的一个上拉电阻,再连回GPIO的3.3V针脚。
3.选择一个GPIO的输出针脚,串联一个电阻。
4.将电阻的另一头连到面包板上LED的阳极。
5.将LED的阴极连到GPIO的接地针脚。

更多外设信息:
https://developer.android.com/things/hardware/hardware-101.html
可选的GPIO设备:

https://developer.android.com/things/hardware/edison-arduino-io.html
https://developer.android.com/things/hardware/edison-sparkfun-io.html
https://developer.android.com/things/hardware/pico-io.html
https://developer.android.com/things/hardware/raspberrypi-io.html
交互
1.扫描外围设备
核心api就是PeripheralManagerService。
|
1 2 3 4 5 6 7 8 9 10 11 12 13 |
public class HomeActivity extends Activity { private static final String TAG = "HomeActivity"; @Override protected void onCreate(Bundle savedInstanceState) { super.onCreate(savedInstanceState); PeripheralManagerService service = new PeripheralManagerService(); Log.d(TAG, "Available GPIO: " + service.getGpioList()); } } |
2.响应按钮事件
和面包板上的按钮来个交互。按下按钮时对事件进行处理。
1.Use PeripheralManagerService to open a connection with the GPIO port wired to the button.
2.Configure the port with DIRECTION_IN.
3.Configure which state transitions will generate callback events with setEdgeTriggerType().
4.Register a GpioCallback to receive edge trigger events.
5.Return true within onGpioEdge() to continue receiving future edge trigger events.
6.When the application no longer needs the GPIO connection, close the Gpio resource.
英语好的看上面,不好的看我说:
1.使用PMS通过GPIO连接到按钮。
2.使用DIRECTION_IN标记配置端口。
3.使用setEdgeTriggerType()方法配置在什么状态下触发事件回调。
4.注册一个GpioCallback接收事件。
5.事件处理结束后返回true。
6.应用退出时关闭连接。
看代码吧:
|
1 2 3 4 5 6 7 8 9 10 11 12 13 14 15 16 17 18 19 20 21 22 23 24 25 26 27 28 29 30 31 32 33 34 35 36 37 38 39 40 41 42 43 44 45 46 47 48 49 50 51 52 53 |
public class ButtonActivity extends Activity { private static final String TAG = "ButtonActivity"; private static final String GPIO_PIN_NAME = ...; private Gpio mButtonGpio; @Override protected void onCreate(Bundle savedInstanceState) { super.onCreate(savedInstanceState); PeripheralManagerService service = new PeripheralManagerService(); try { // Step 1. Create GPIO connection. mButtonGpio = service.openGpio(GPIO_PIN_NAME); // Step 2. Configure as an input. mButtonGpio.setDirection(Gpio.DIRECTION_IN); // Step 3. Enable edge trigger events. mButtonGpio.setEdgeTriggerType(Gpio.EDGE_FALLING); // Step 4. Register an event callback. mButtonGpio.registerGpioCallback(mCallback); } catch (IOException e) { Log.e(TAG, "Error on PeripheralIO API", e); } } // Step 4. Register an event callback. private GpioCallback mCallback = new GpioCallback() { @Override public boolean onGpioEdge(Gpio gpio) { Log.i(TAG, "GPIO changed, button pressed"); // Step 5. Return true to keep callback active. return true; } }; @Override protected void onDestroy() { super.onDestroy(); // Step 6. Close the resource if (mButtonGpio != null) { mButtonGpio.unregisterGpioCallback(mCallback); try { mButtonGpio.close(); } catch (IOException e) { Log.e(TAG, "Error on PeripheralIO API", e); } } } } |
3.点亮LED
1.Use PeripheralManagerService to open a connection with the GPIO port wired to the LED.
2.Configure the port with DIRECTION_OUT_INITIALLY_LOW.
3.Toggle the state of the LED by passing the inverse of getValue() to the setValue() method.
4.Use a Handler to schedule an event to toggle the GPIO again after a short delay.
5.When the application no longer needs the GPIO connection, close the Gpio resource.
1.使用PMS通过GPIO连接上LED。
2.使用DIRECTION_OUT_INITIALLY_LOW标记配置端口。
3.调用 getValue() 和 setValue() 方法切换LED的状态。
4.使用Handler进行适当延迟,再次切换LED状态,产生闪烁效果。
5.应用退出时断开连接回收资源。
|
1 2 3 4 5 6 7 8 9 10 11 12 13 14 15 16 17 18 19 20 21 22 23 24 25 26 27 28 29 30 31 32 33 34 35 36 37 38 39 40 41 42 43 44 45 46 47 48 49 50 51 52 53 54 55 56 57 58 59 60 61 62 63 64 65 66 |
public class BlinkActivity extends Activity { private static final String TAG = "BlinkActivity"; private static final int INTERVAL_BETWEEN_BLINKS_MS = 1000; private static final String GPIO_PIN_NAME = ...; private Handler mHandler = new Handler(); private Gpio mLedGpio; @Override protected void onCreate(Bundle savedInstanceState) { super.onCreate(savedInstanceState); // Step 1. Create GPIO connection. PeripheralManagerService service = new PeripheralManagerService(); try { mLedGpio = service.openGpio(GPIO_PIN_NAME); // Step 2. Configure as an output. mLedGpio.setDirection(Gpio.DIRECTION_OUT_INITIALLY_LOW); // Step 4. Repeat using a handler. mHandler.post(mBlinkRunnable); } catch (IOException e) { Log.e(TAG, "Error on PeripheralIO API", e); } } @Override protected void onDestroy() { super.onDestroy(); // Step 4. Remove handler events on close. mHandler.removeCallbacks(mBlinkRunnable); // Step 5. Close the resource. if (mLedGpio != null) { try { mLedGpio.close(); } catch (IOException e) { Log.e(TAG, "Error on PeripheralIO API", e); } } } private Runnable mBlinkRunnable = new Runnable() { @Override public void run() { // Exit if the GPIO is already closed if (mLedGpio == null) { return; } try { // Step 3. Toggle the LED state mLedGpio.setValue(!mLedGpio.getValue()); // Step 4. Schedule another event after delay. mHandler.postDelayed(mBlinkRunnable, INTERVAL_BETWEEN_BLINKS_MS); } catch (IOException e) { Log.e(TAG, "Error on PeripheralIO API", e); } } }; } |
集成外设驱动
外设驱动库:
https://developer.android.com/things/sdk/driver-library.html
一个示例:
https://github.com/androidthings/sample-button
关键api,UserDriverManager。通过此进行集成和绑定。
1.初始化库
1)关于支持(电子元件)的外设清单:
https://github.com/androidthings/contrib-drivers
https://github.com/androidthings/drivers-samples
2)build.gradle
|
1 2 3 4 5 6 |
dependencies { ... compile 'com.google.android.things.contrib:driver-button:0.1' } |
3)使用选择的元器件资源文件初始化驱动类。
4)及时关闭连接回收资源。
|
1 2 3 4 5 6 7 8 9 10 11 12 13 14 15 16 17 18 19 20 21 22 23 24 25 26 27 28 29 30 31 32 33 34 35 36 37 38 39 40 41 |
import com.google.android.things.contrib.driver.button.Button; import com.google.android.things.contrib.driver.button.ButtonInputDriver; ... public class ButtonActivity extends Activity { private static final String TAG = "ButtonActivity"; private static final String GPIO_PIN_NAME = ...; private ButtonInputDriver mButtonInputDriver; @Override protected void onCreate(Bundle savedInstanceState) { super.onCreate(savedInstanceState); try { // Step 3. Initialize button driver with selected GPIO pin mButtonInputDriver = new ButtonInputDriver( GPIO_PIN_NAME, Button.LogicState.PRESSED_WHEN_LOW, KeyEvent.KEYCODE_SPACE); } catch (IOException e) { Log.e(TAG, "Error configuring GPIO pin", e); } } @Override protected void onDestroy(){ super.onDestroy(); // Step 5. Close the driver and unregister if (mButtonInputDriver != null) { try { mButtonInputDriver.close(); } catch (IOException e) { Log.e(TAG, "Error closing Button driver", e); } } } } |
2.使用
代码中,注册了一个ButtonInputDriver,当外设按下或放开时会做出响应。
|
1 2 3 4 5 6 7 8 9 10 11 12 13 14 15 16 17 18 19 20 21 22 23 24 25 26 27 28 29 30 31 32 33 34 35 36 37 38 39 40 41 42 43 44 45 46 |
import com.google.android.things.userdriver.InputDriver; import com.google.android.things.userdriver.UserDriverManager; ... public class ButtonActivity extends Activity { private static final String TAG = "ButtonActivity"; ... private ButtonInputDriver mButtonInputDriver; ... @Override protected void onStart() { super.onStart(); mButtonInputDriver.register(); } @Override protected void onStop() { super.onStop(); mButtonInputDriver.unregister(); } @Override public boolean onKeyDown(int keyCode, KeyEvent event) { if (keyCode == KeyEvent.KEYCODE_ESCAPE) { // Handle button pressed event return true; } return super.onKeyDown(keyCode, event); } @Override public boolean onKeyUp(int keyCode, KeyEvent event) { if (keyCode == KeyEvent.KEYCODE_ESCAPE) { // Handle button released event return true; } return super.onKeyUp(keyCode, event); } } |
本文由崔维友 威格灵 cuiweiyou vigiles cuiweiyou 原创,转载请注明出处:http://www.gaohaiyan.com/2108.html
承接App定制、企业web站点、办公系统软件 设计开发,外包项目,毕设


